Hello World!
In this chapter, you will familiarise yourself with the software development environment for the kit by building a simple Hello World! sample.
You will learn
-
How to navigate in PlatformIO
-
How to create a new project
-
How to configure the serial port
-
How to write a simple program
-
How to compile and upload the program to the kit
The example you will build will print Hello World! to the serial monitor and blink the LED on the board.
If you have not set up your editor as described in chapter Setting up the Environment, please do this first.
Create and Configure the Project
| Plug your kit into a USB port of your computer. |
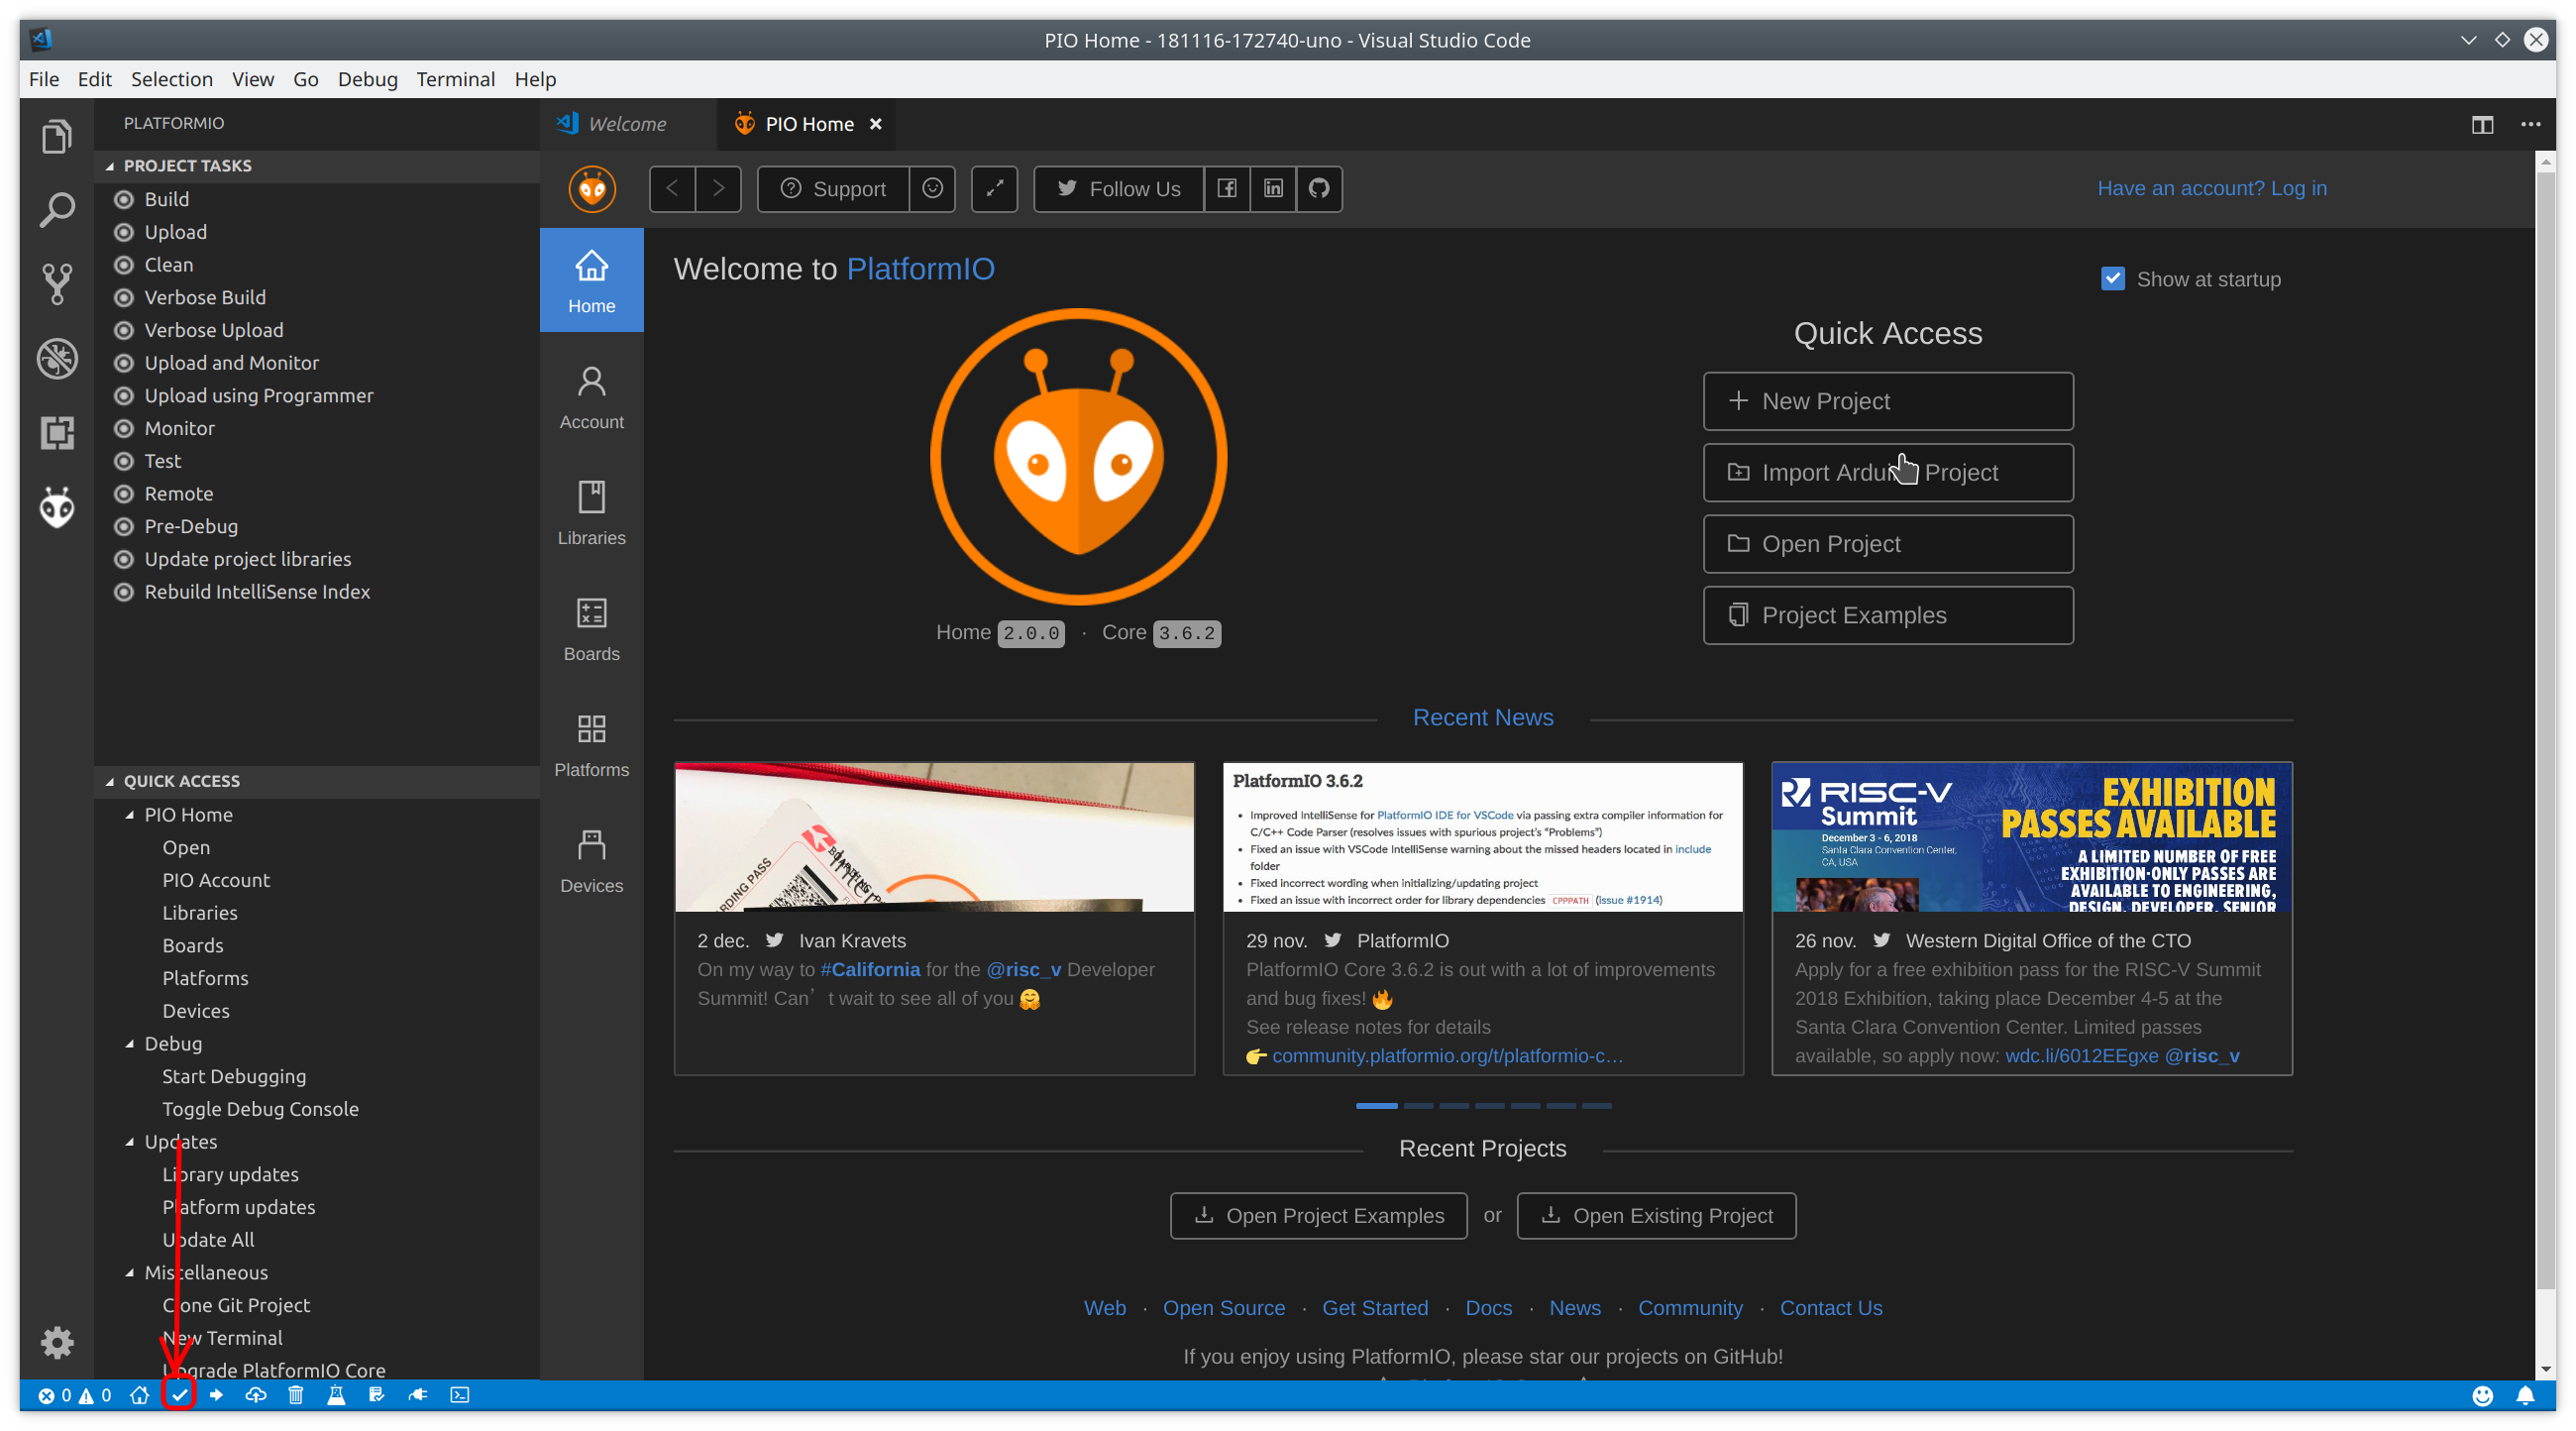
Open up your editor and load the PlatformIO plugin.
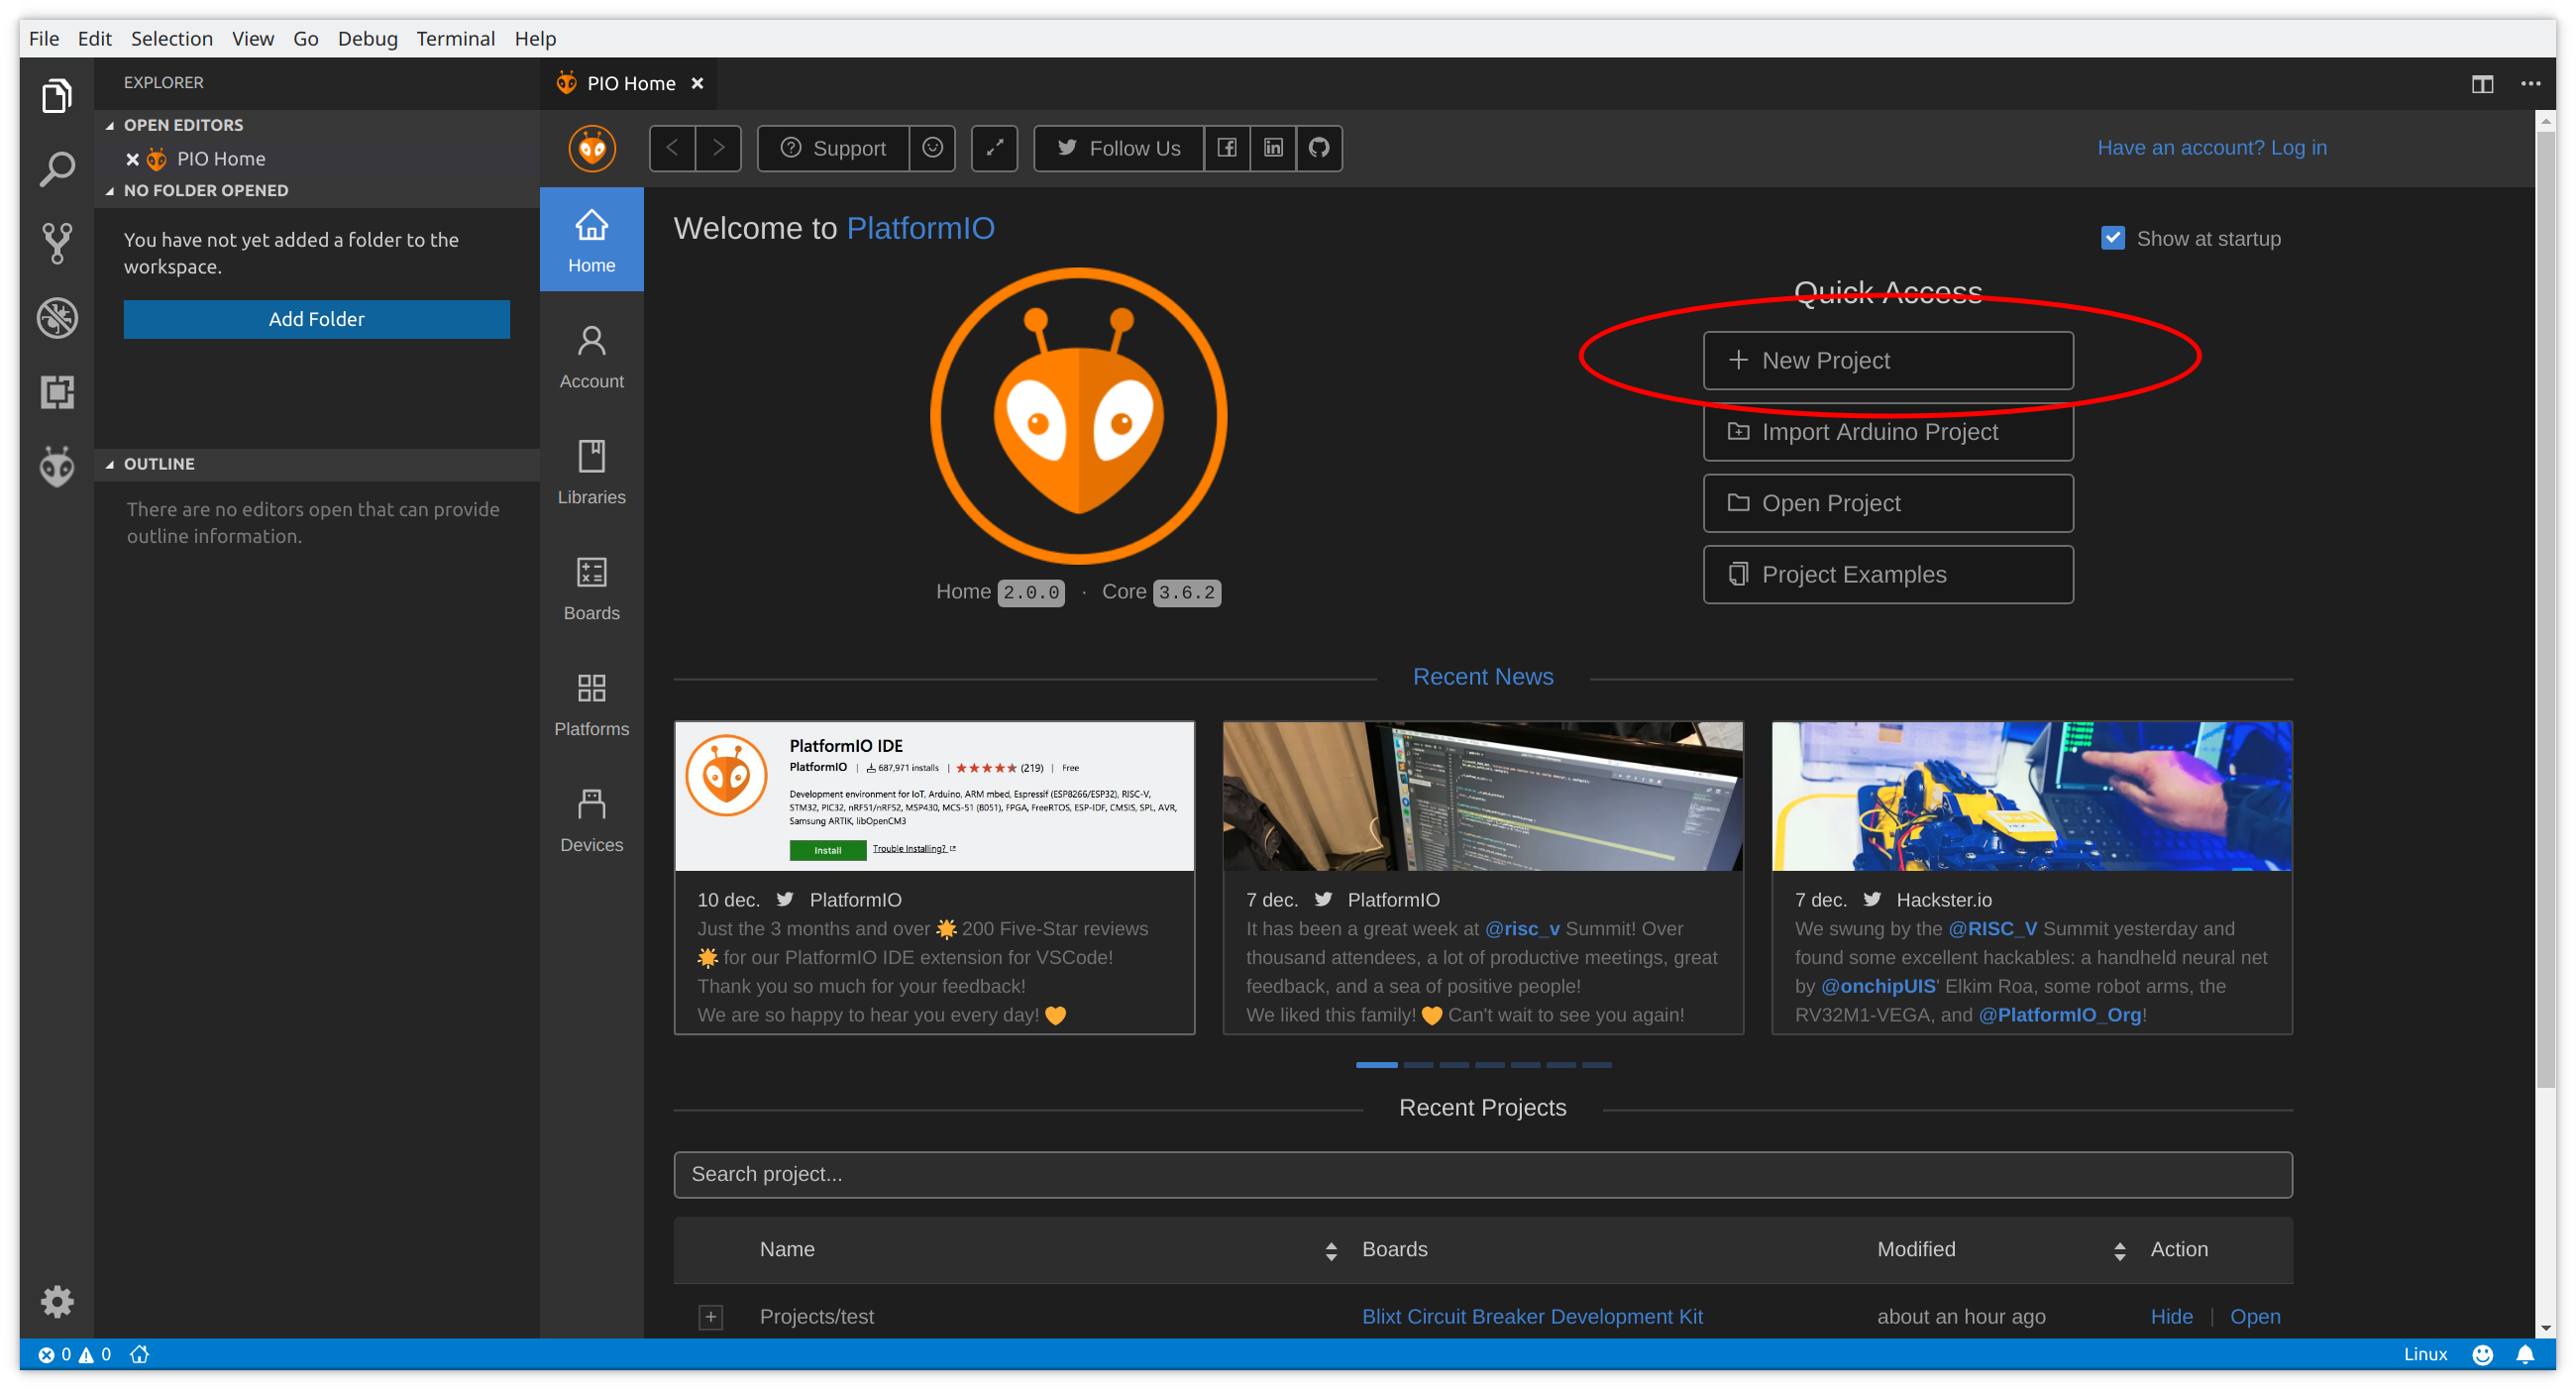
Once on the PlatformIO home screen click the New Project button.
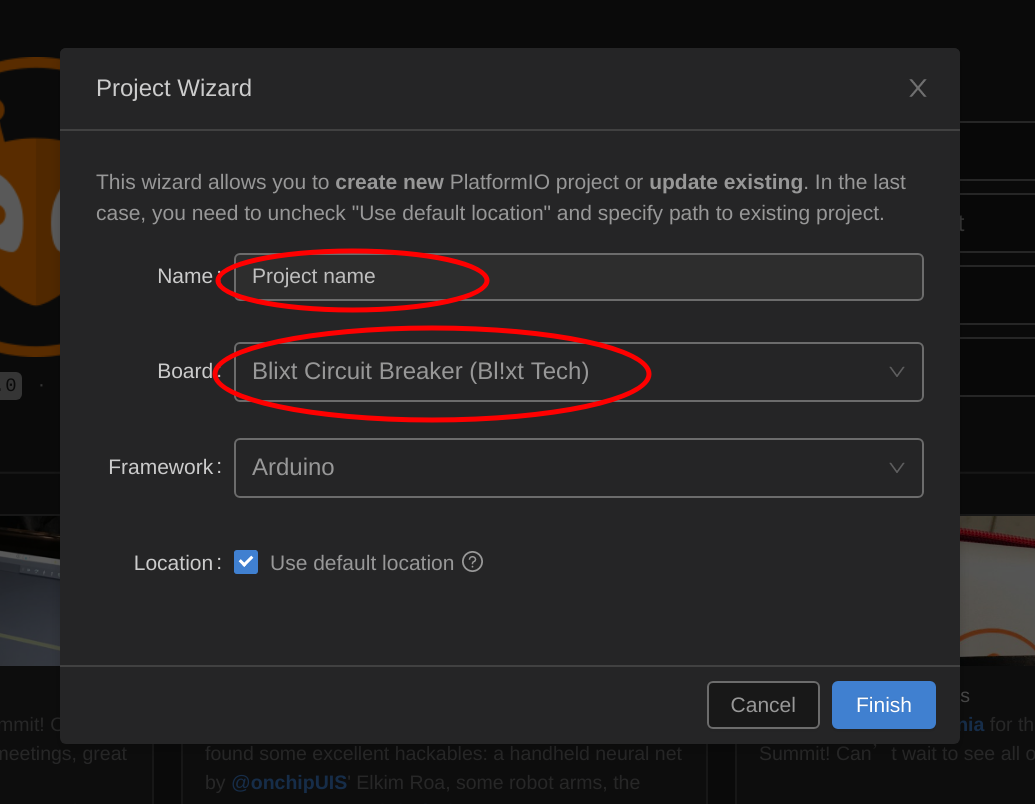
In the popup enter the project name my first blixt project, select Blixt Circuit Breaker under board and then hit Finish.
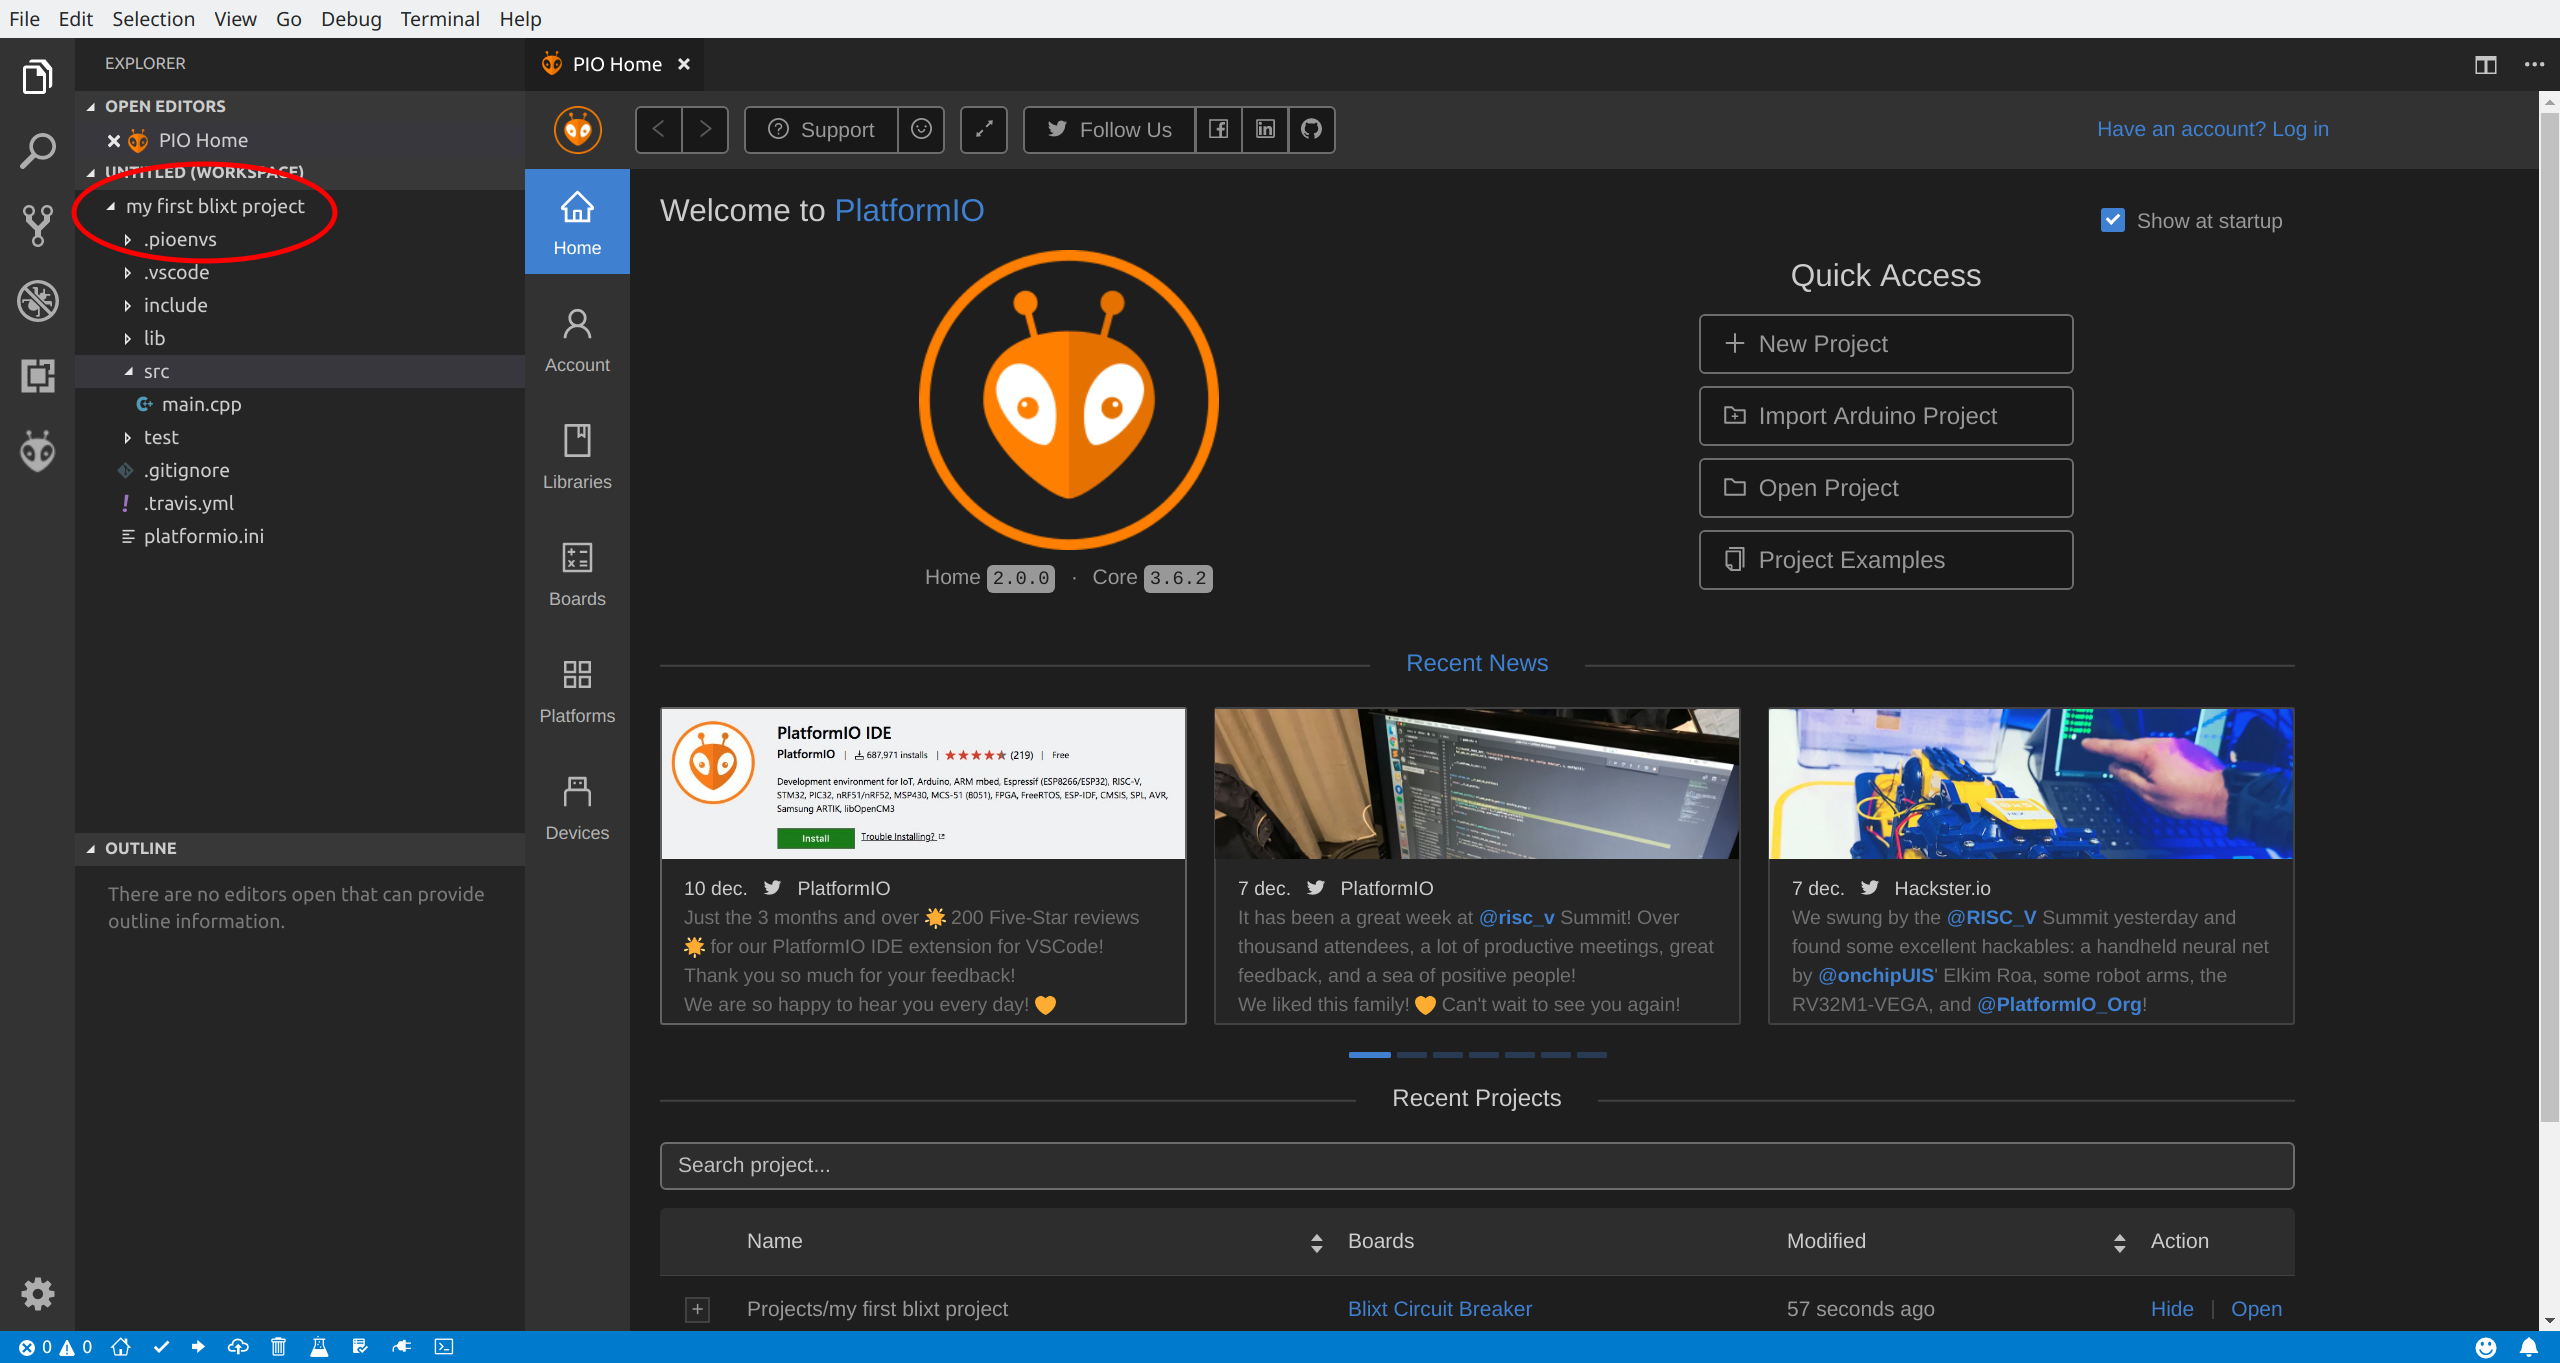
After this, you should see the project appearing in the Explorer window as shown below.
Next, open the platformio.ini file to configure the serial port.
Add the following line directly under the line starting with framework
monitor_speed = 115200This setting will configure the UART speed needed for the examples.
The Program
Open the file main.cpp in the src folder in the project explorer view.
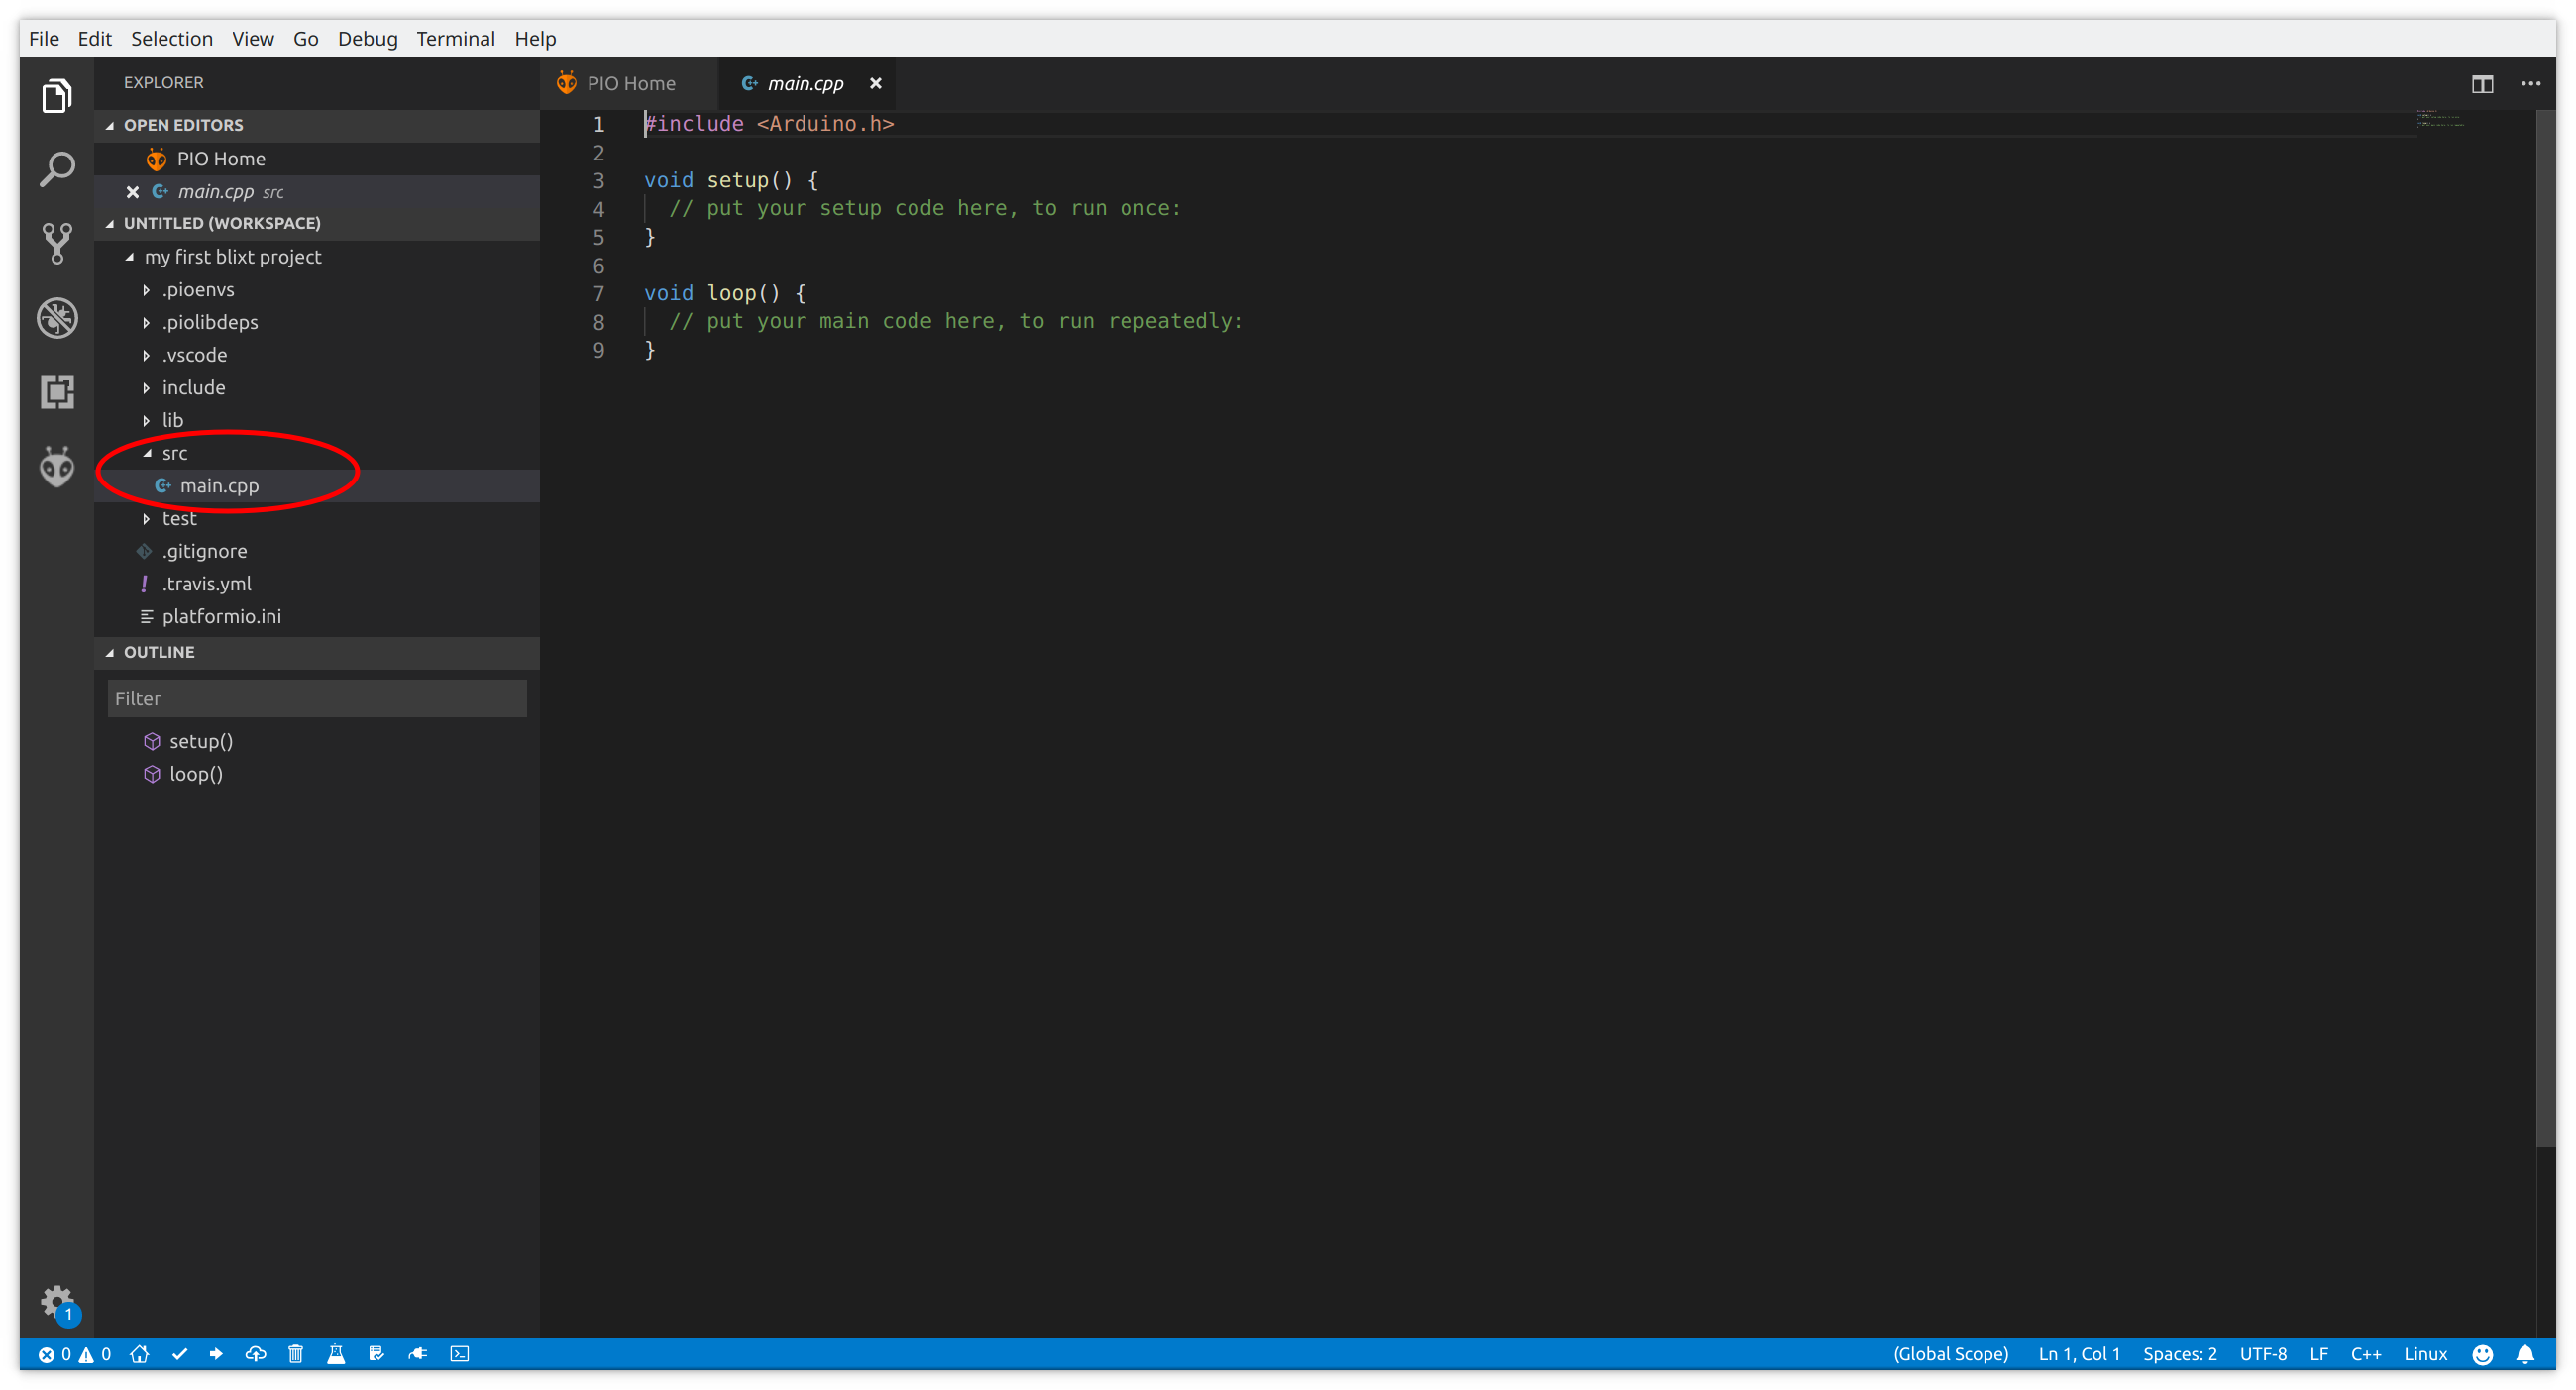
The replace the text in it with the following program.
#include <Arduino.h>
#include <BCB.h> (1)

void setup() { (2)
  Serial.begin(115200);
  BCB::init();  (3)
}


void loop() { (4)
  Serial.write("Hello World!");    (5)
  BCB::ledOn();                    (6)
  delay(1000);                     (7)
  BCB::ledOff();                   (8)
  delay(1000);                     (9)
}| 1 | Include the BCB header |
| 2 | Put all your initialization code into the setup function. It is only called once at the start of the program. |
| 3 | Initialises the BCB |
| 4 | The loop() function is called repeatedly by the main loop |
| 5 | Writes the string "Hello World!" on the serial port |
| 6 | Turns the green LED on |
| 7 | Waits for a second |
| 8 | Turns the green LED off |
| 9 | Waits for another second |
Press the Build icon at the bottom of the screen.
You will see how the code will be compiled at the bottom of the screen.
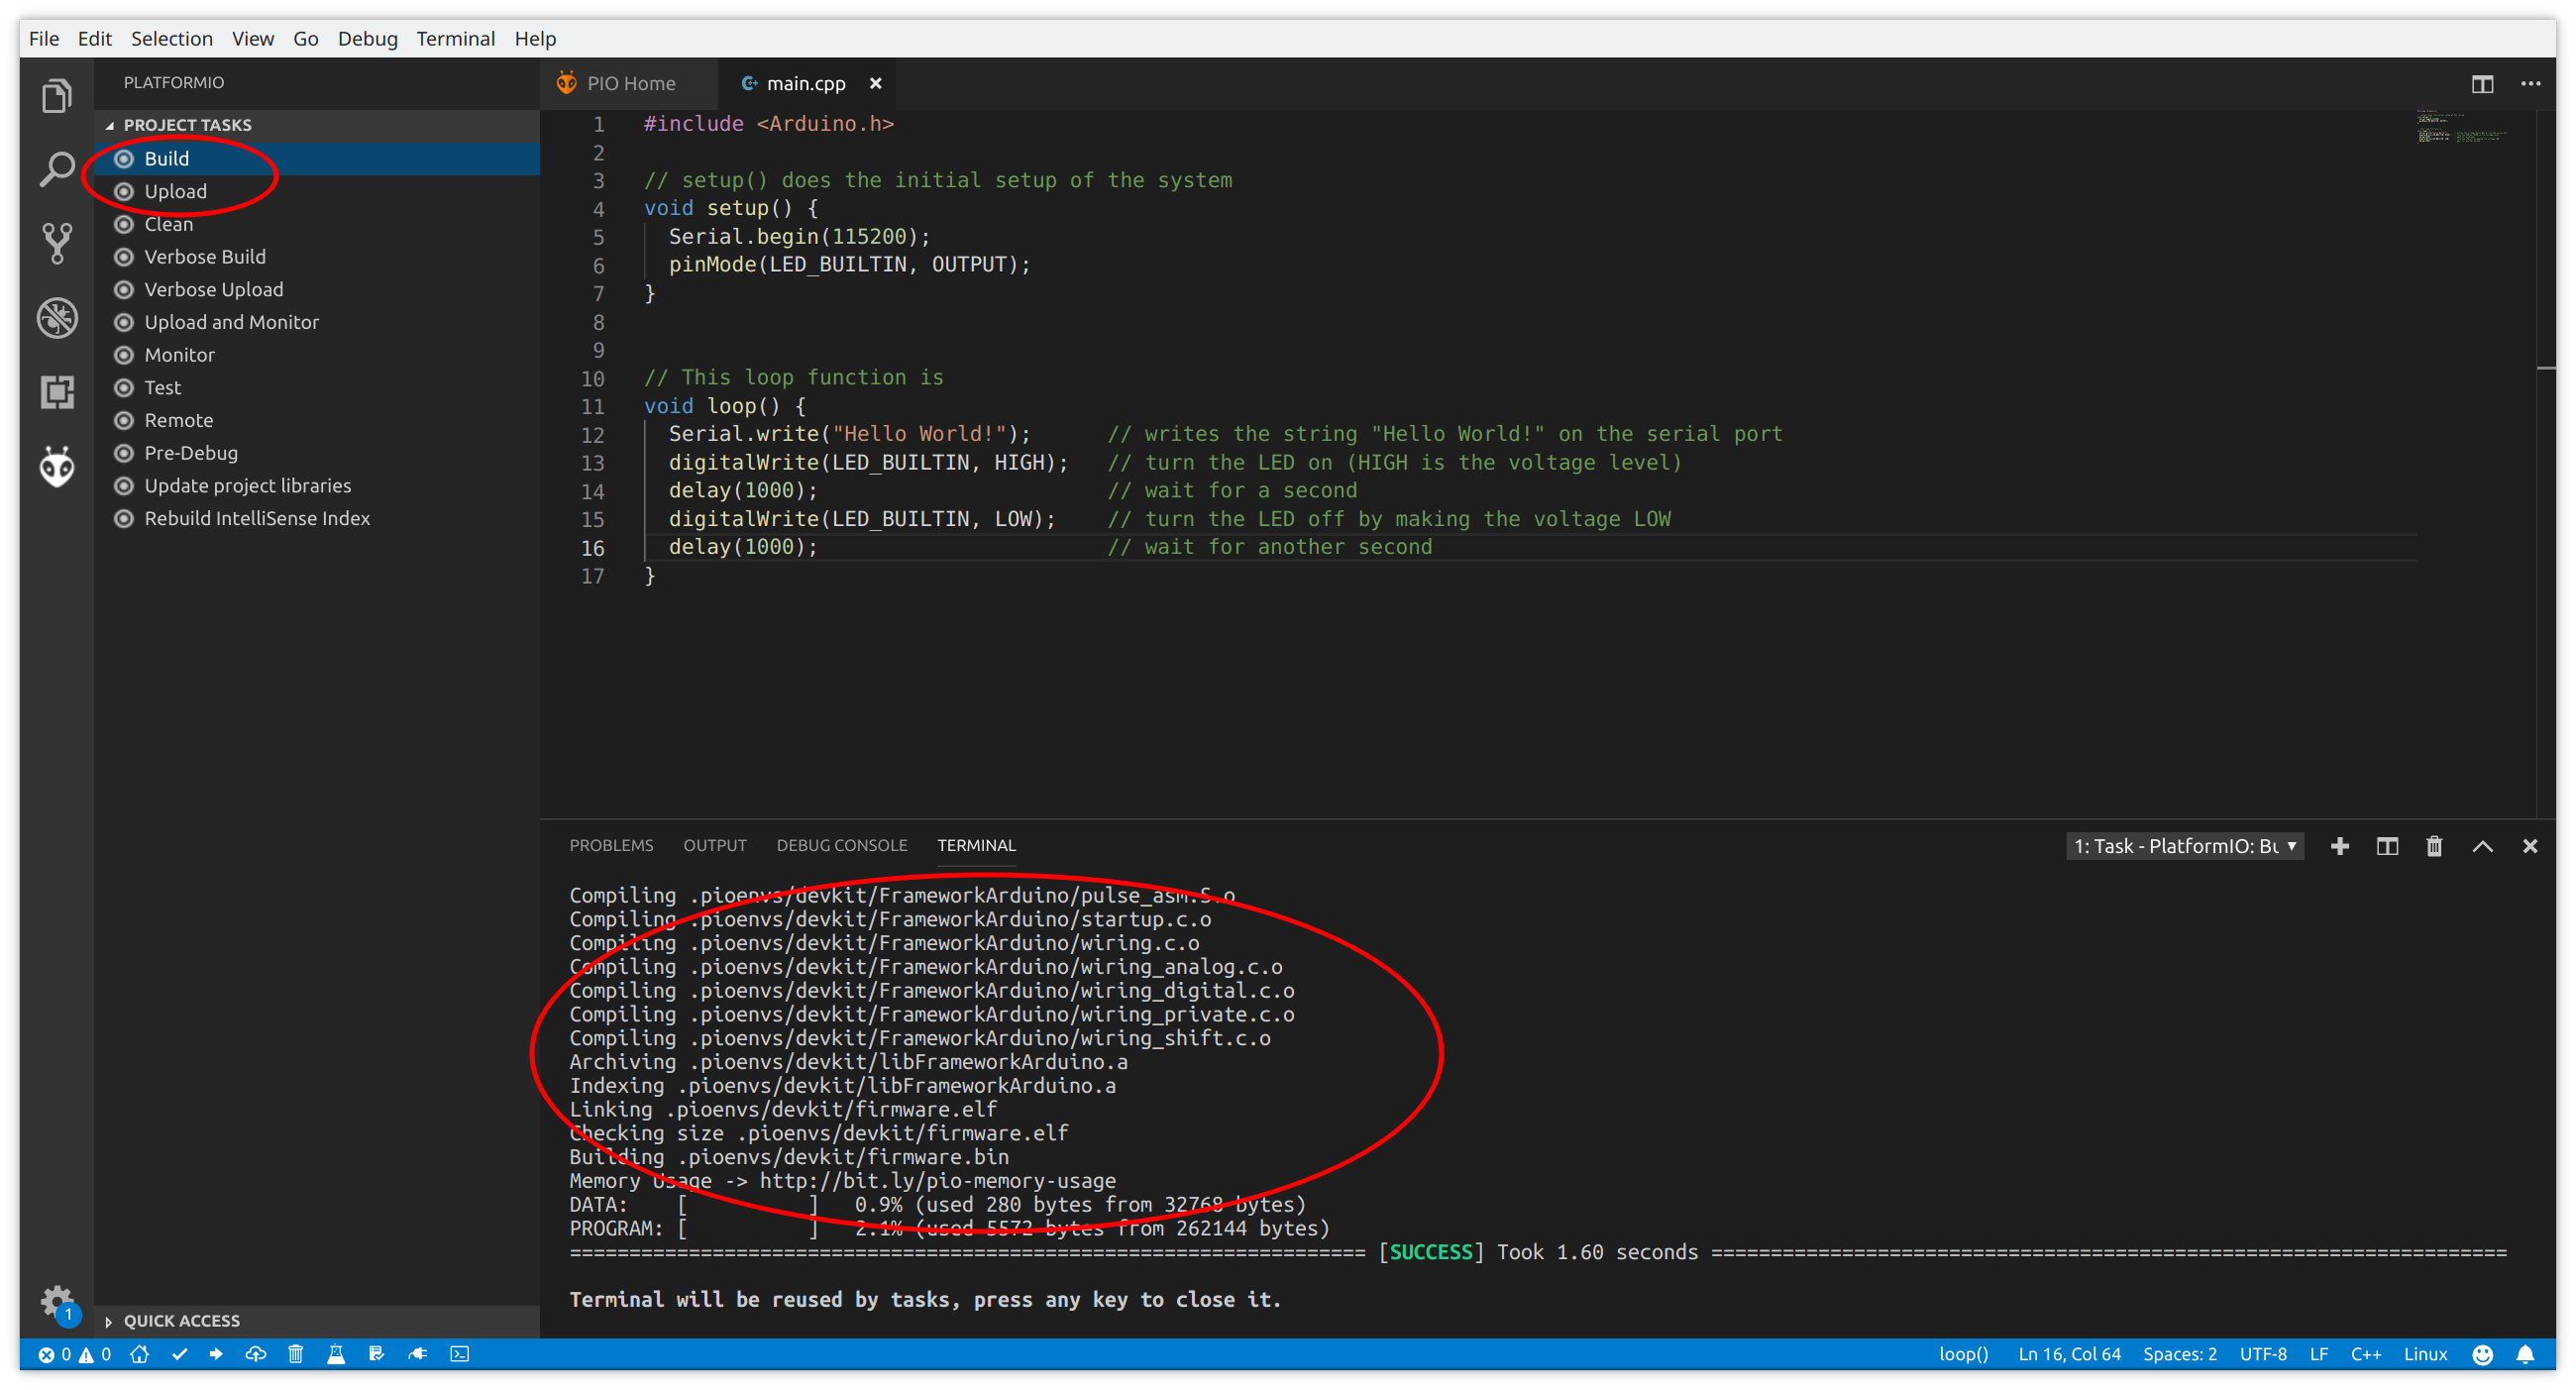
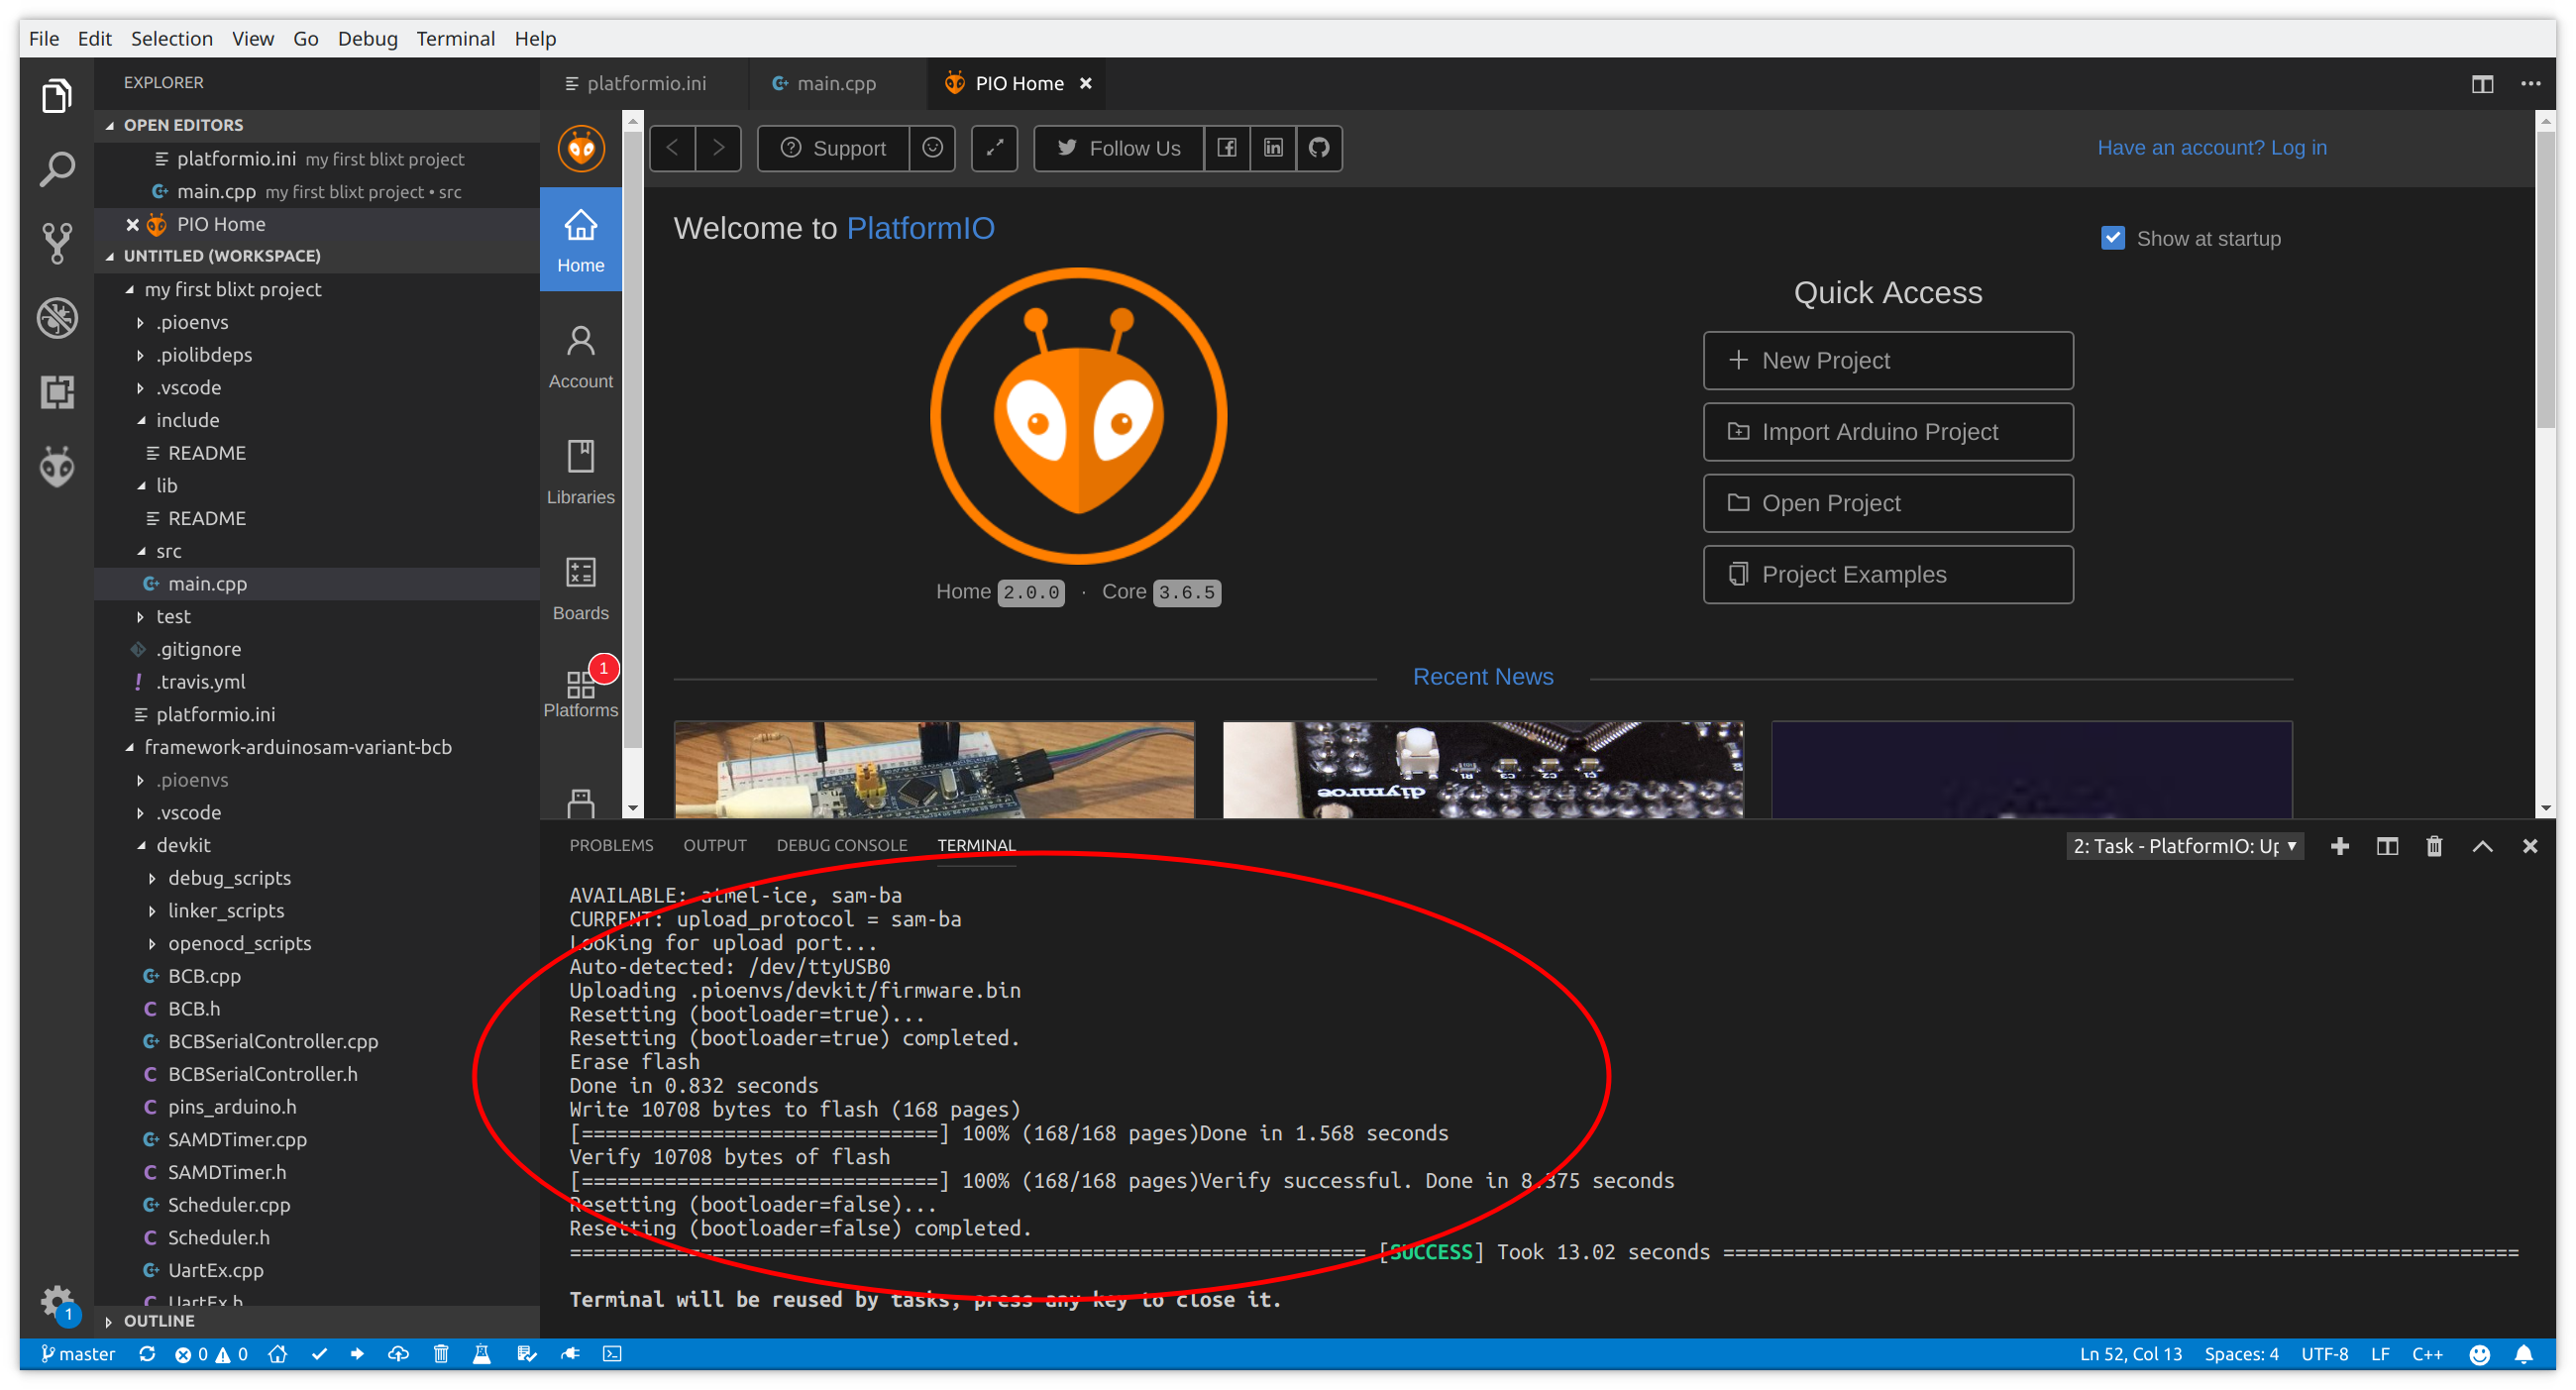
If the build is successful press the Upload task (located straight below the Build task) to upload the firmware to the kit. You should see the output on the console similar to the one below.
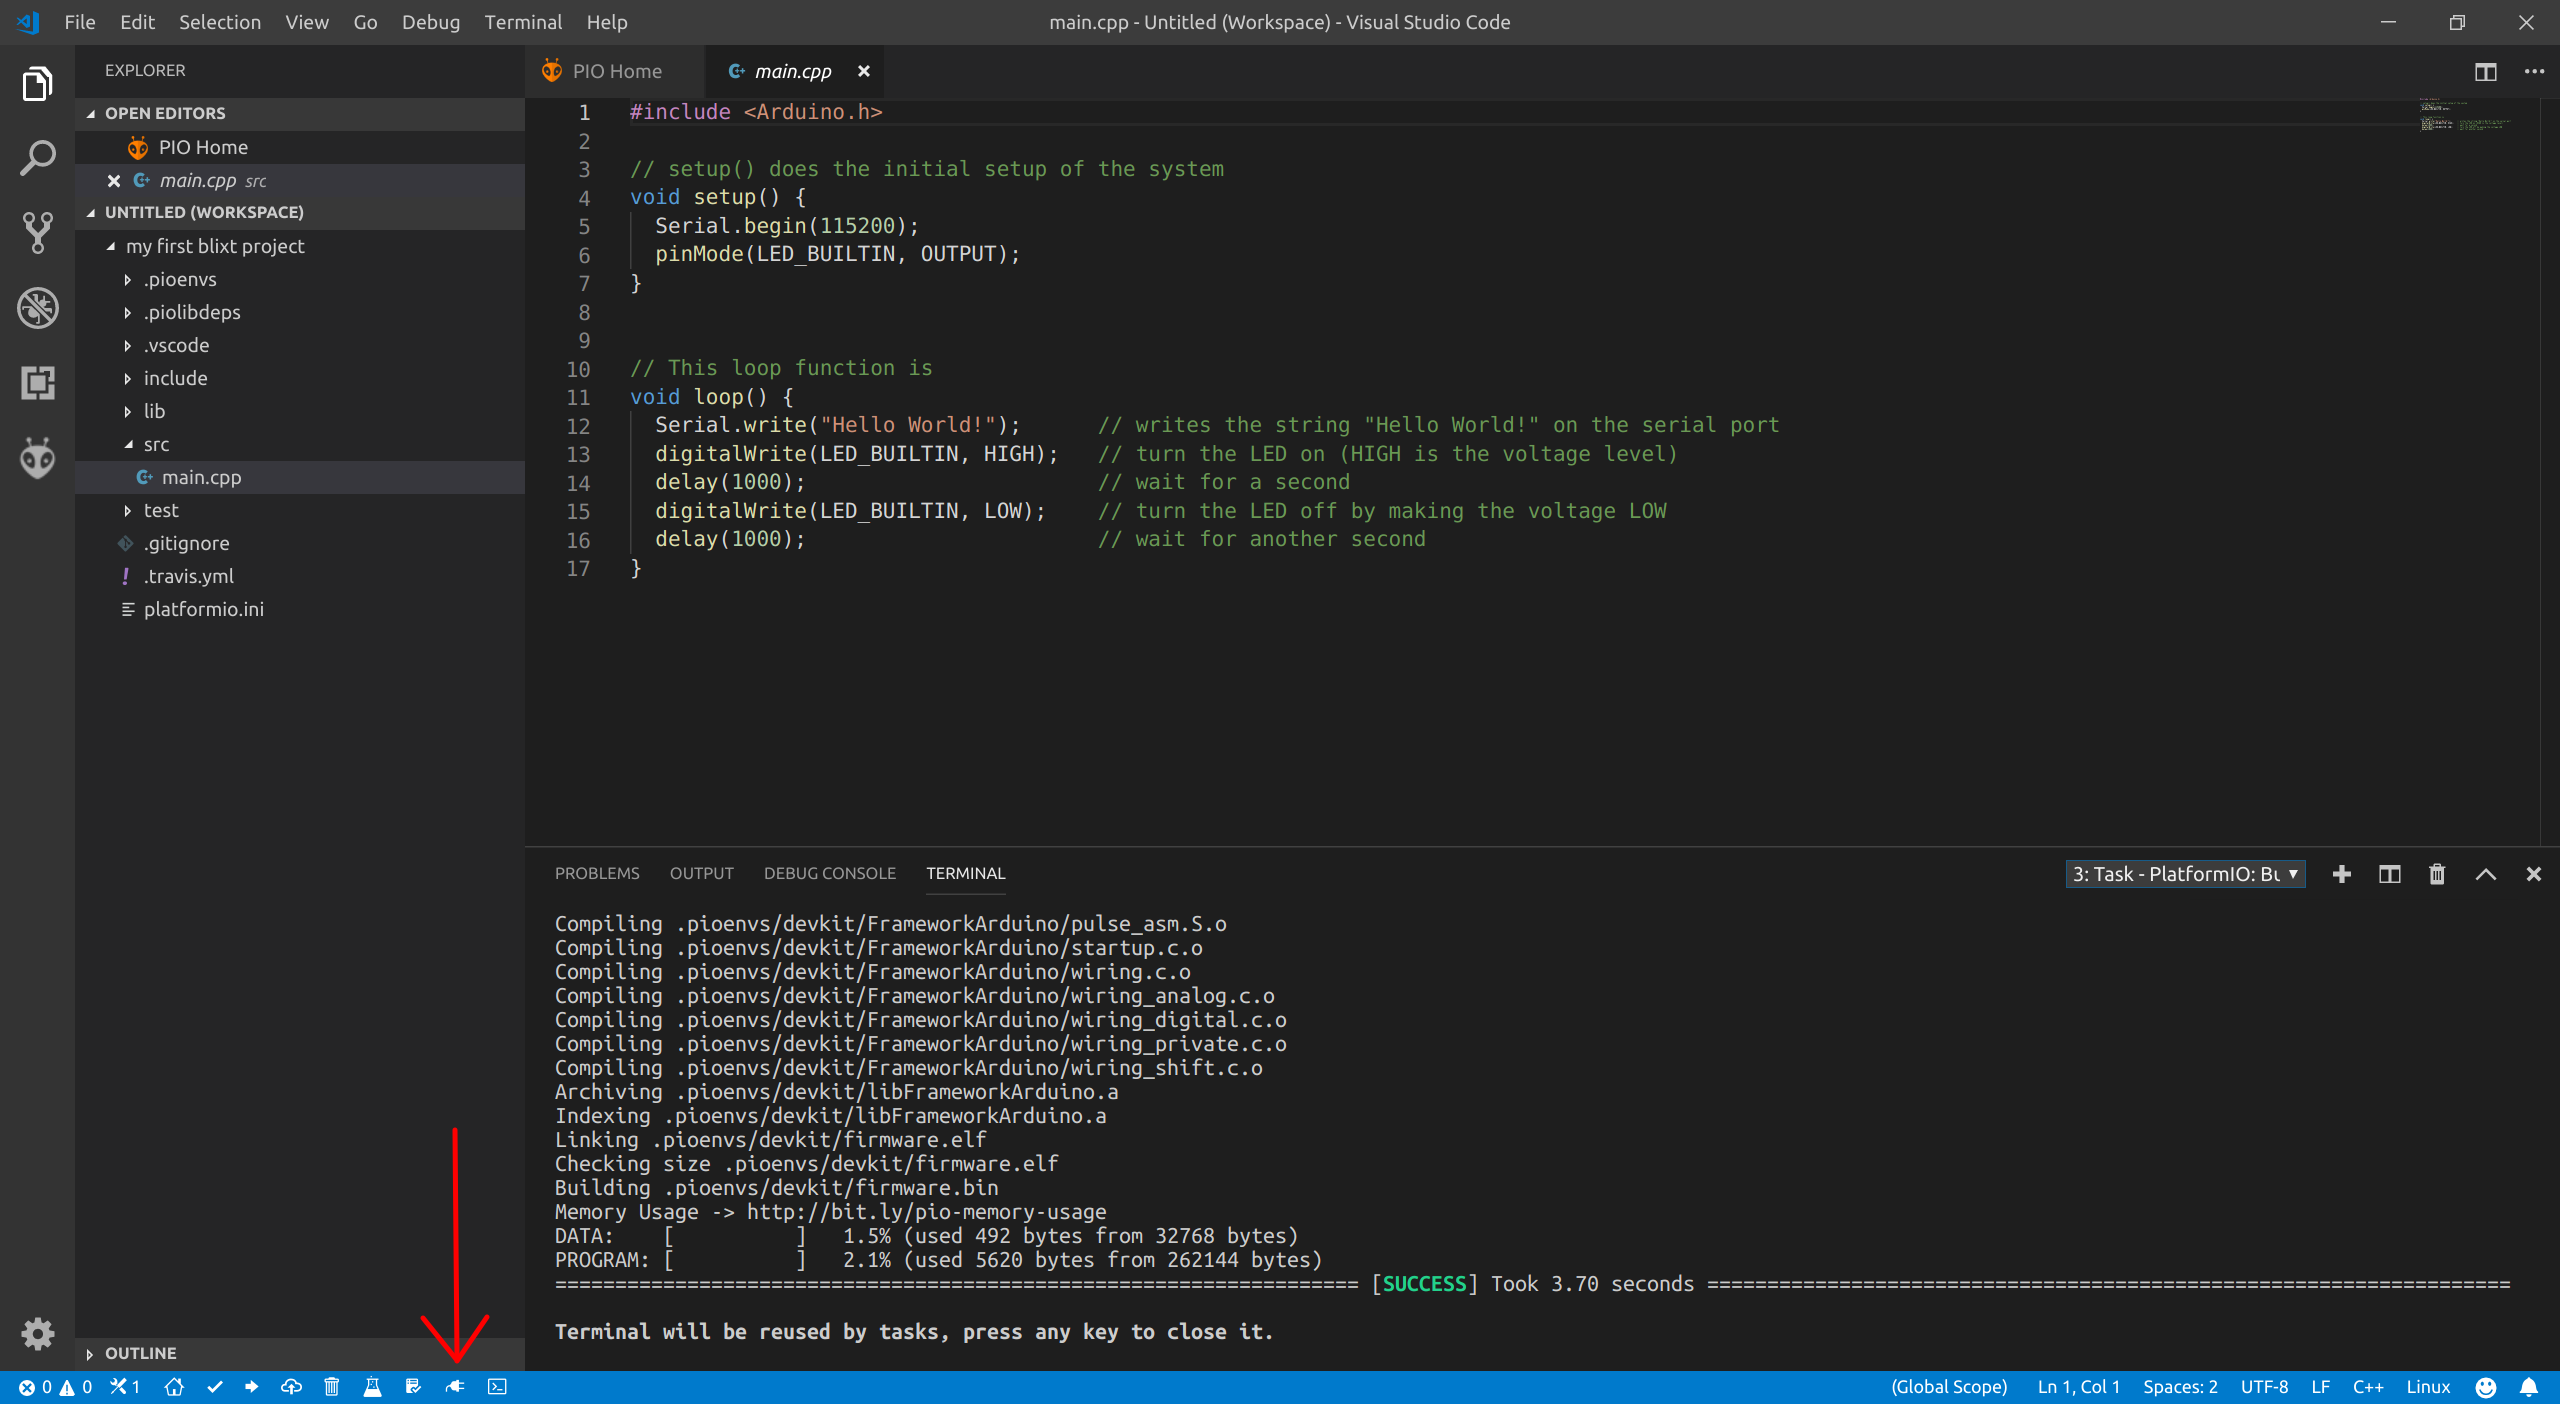
Next, open the serial monitor by clicking on the icon shown in the picture below and you should see the 'Hello World!' strings and the LED blinking.
Congratulations, you managed to successfully create your first program and upload it to the dev kit!
Let’s move on and start getting to know the functionality of the actual circuit breaker dev kit.